iPad Drawing Technique
if you’ve studied with iPad drawing technique (or anything at all) with me before, you know that I don’t believe in one way of doing ANYTHING!!!
So today I’m here to share something i’m passionate about:
FREEHAND iPad Drawing technique.
I’m going to use Adobe Draw app today to show you ONE WAY that you can approach building a drawing on your iPad or tablet. NOW I USE ADOBE FRESCO TO DO THE SAME TECHNIQUES as Draw app has migrated to Adobe FRESCO.
I always say “building” a drawing
or “building a body” because I feel really strong about the process of creating a drawing.
I love iPad drawing technique because I can zoom in on my sketches.
On paper, you can’t try techniques and colors and then “undo” them.
How cool is it that you CAN on your iPad???
When you allow yourself to have a process
in your iPad drawing technique, and value that over PERFECTION, for me, that’s where the magic lies.
“MAGIC”. Meaning: surprise, adventure, emotion, improvisation, connection, inspiration, energy flow, expression, etc….
For me, this is a key value in creationg art and design with pleasure and joy.
And, wouldn’t you say pleasure and joy make beauty??
I’m using ADOBE DRAW APP
on my iPad pro here, but it works beautifully on a regular iPad or mini, or other digital device.

Adobe Draw app is a very clean, smooth, app with deliciously brilliant , clean color and feel.
I HATED IT when I first tried it, because it was so “inorganic” feeling, but lo and behold about a year later, I fell madly in love with it.
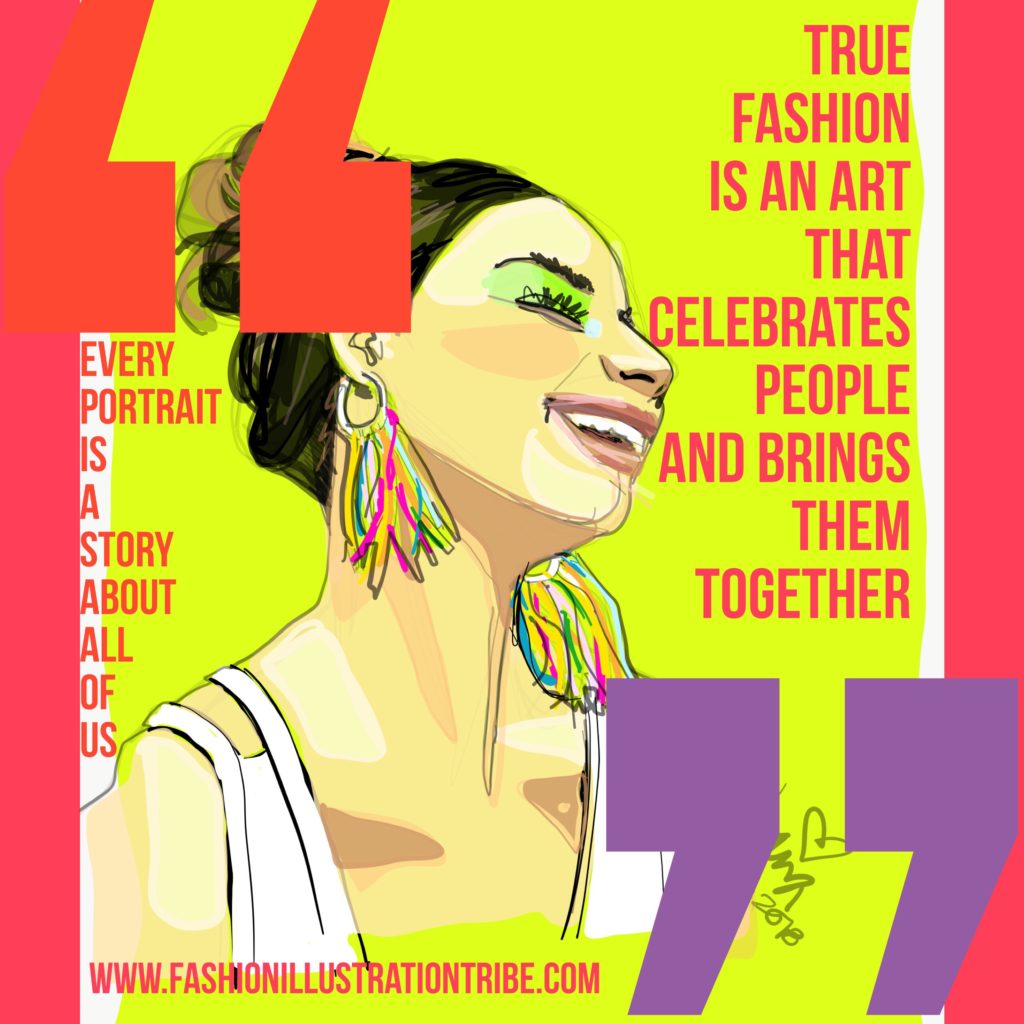
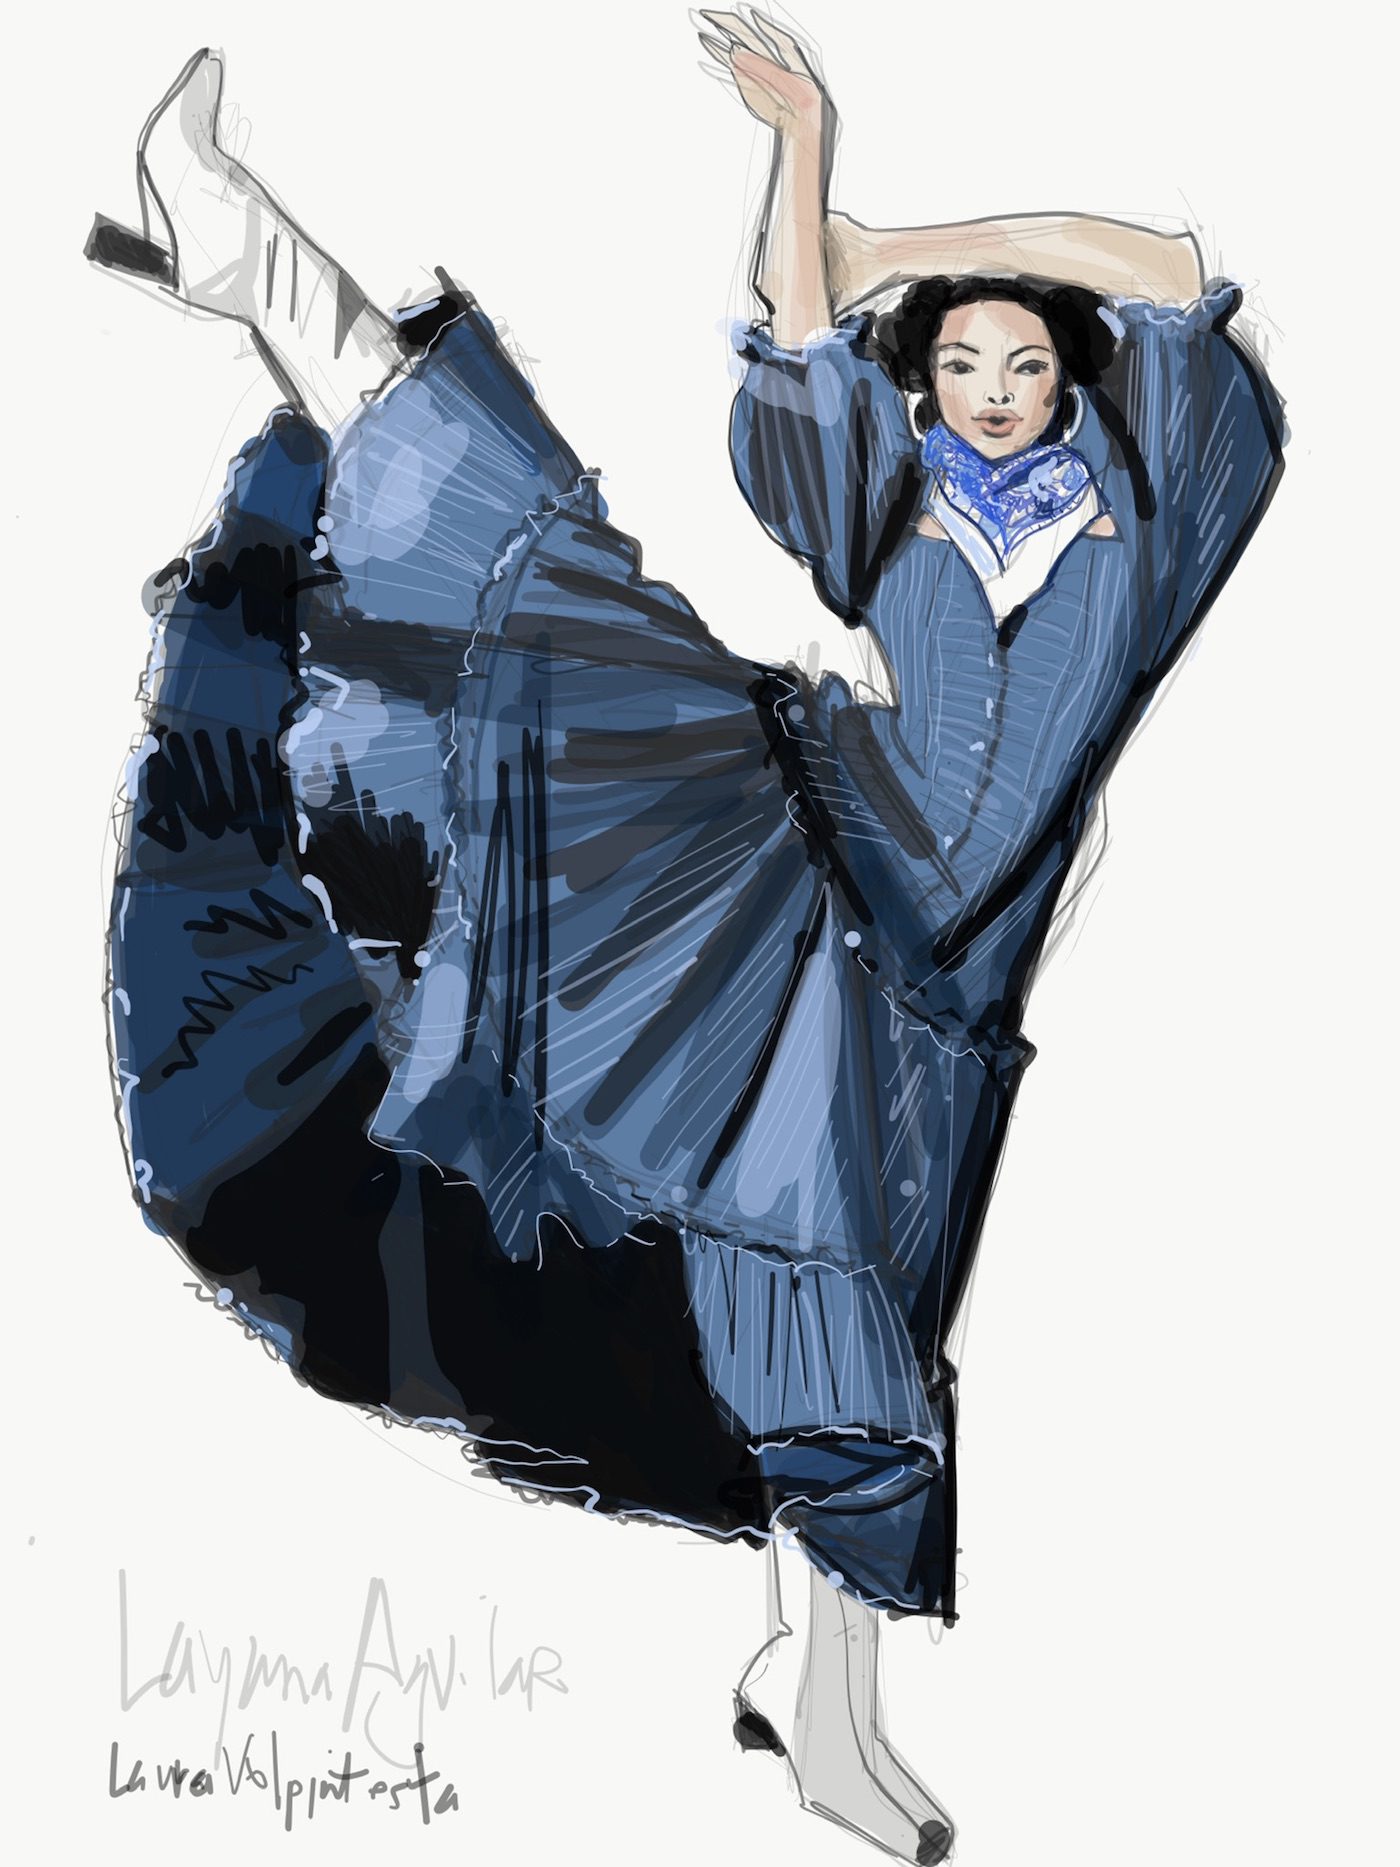
Here, is my finished drawing, but I’m going to follow it up with a few of the steps and explanation of my iPad drawing technique: how I got there.
(ps, do you feel those brilliant colors??)
iPad drawing techniques for Adobe Draw app
(also known as Adobe Illustrator Draw app AND NOW AS ADOBE FRESCO APP) are unique from other digital painting and digital drawing apps.
Some of the keys of the app are:
- it only has 5 brushes (ah, what a relief!!)
- if you create a closed shape, holding your finger or stylus down in the inside of that shape will fill it wtih flat color
and notice, that’ exactly how I created the opaque blue background
Below, you can see how I chose a brush ( the “plain” brush is the first one on the tool bar, at the top.)
See the circle below the “brush” or “tip” tool?
It’s the SIZE tool. Under that, you ‘ll see the OPACITY circle, and the COLOR selection circle is beneath THAT>
I select the brush, and then I can adjust the OPACITY of the brush (I chose a very sheer white), and I can also choose the SIZE of the brush)
If you look at the white marks here, you can see the size and the level of opacity I chose. This opacity setting is basic iPad drawing technique, available in all digital drawing apps I use for fashion illustration.
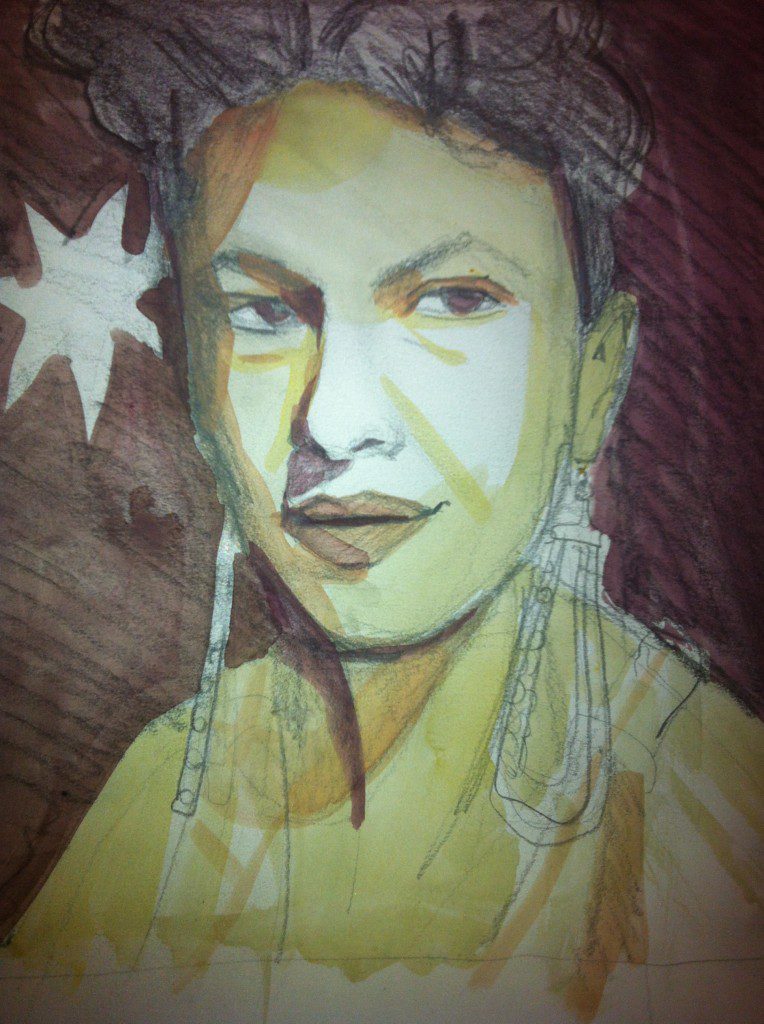
DRAWING LIGHTLY is the KEY PHRASE here
if you draw very soft and lightly, you get the ability of “seeing” the “ghost” of a drawing before you COMMIT to bringing it into clarity
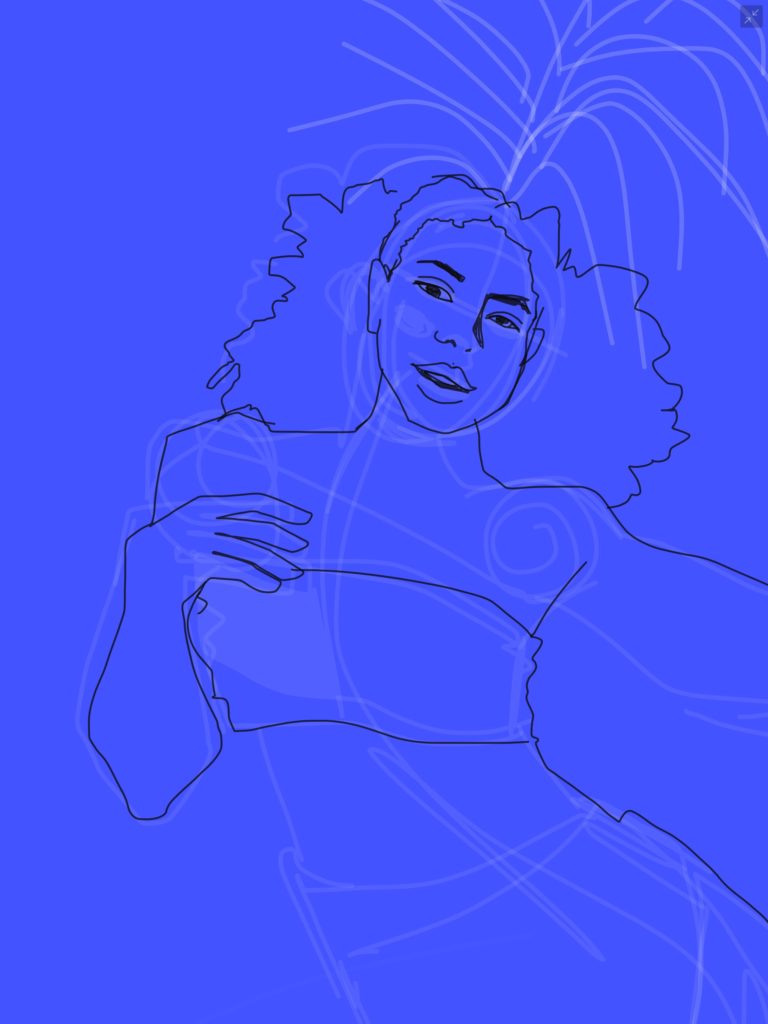
After I liked my white lines, I went back to my toolbar and changed the COLOR SIZE and OPACITY of my brush.
I chose a FINER line, selected the color BLACK, and a MORE OPAQUE setting.
See how I added the contour lines here?? What a great way to define my lines, but with the “guidance” of my light “undersketch” to give me confidence.
FLAT SHAPES OF COLOR
I made sure I “closed” the hair shapes so that I could fill it in as solid back.
NOTICE WHAT HAPPENS when the solid black shape gets added!
It “sets off ” the face, frames it and makes it POP…
and it creates an amazing sense of depth!
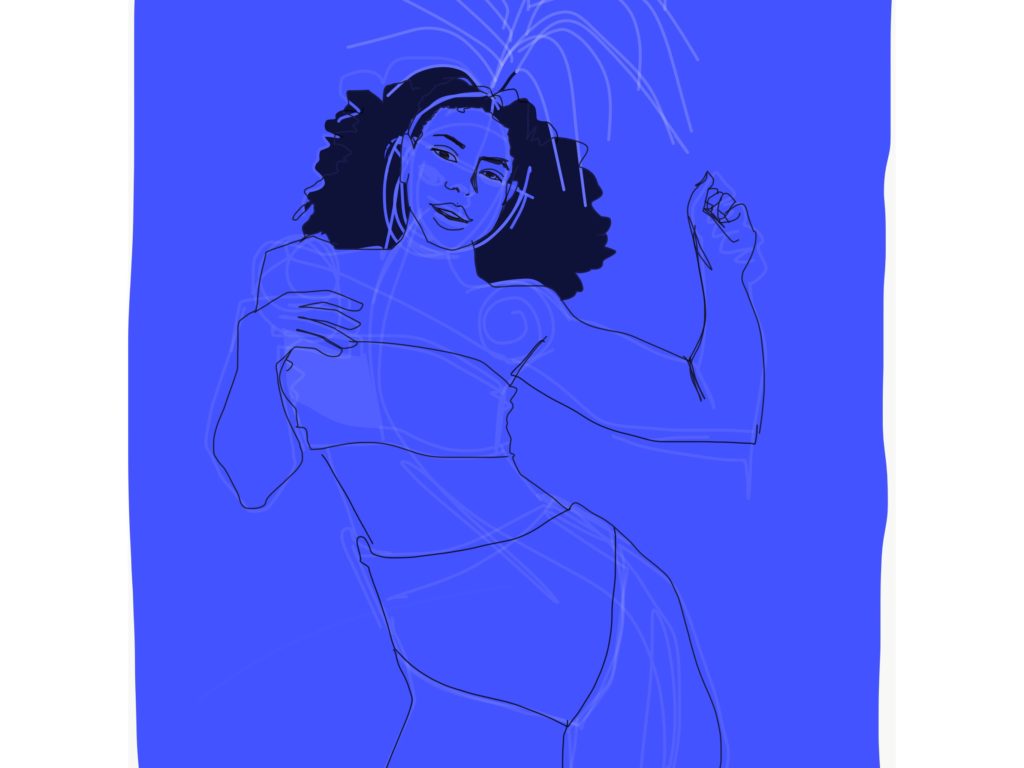
I love the clarity that a fine black line gives me. Articulation in the face and fingers, contrasting with long, clean curves.
Finally,
you can see that I chose a much larger brush/ tip, and kept it slightly sheer.
This gives me the ability to layer and layer strokes to build up to opacity, and it gives a painterly feeling.
(Flat shapes of tone are less organic in feeling).
REMEMBER: not one is better than the other, My recommendation is To PLAY WITH THE EXTREMES!
See how different techniques make you feel!
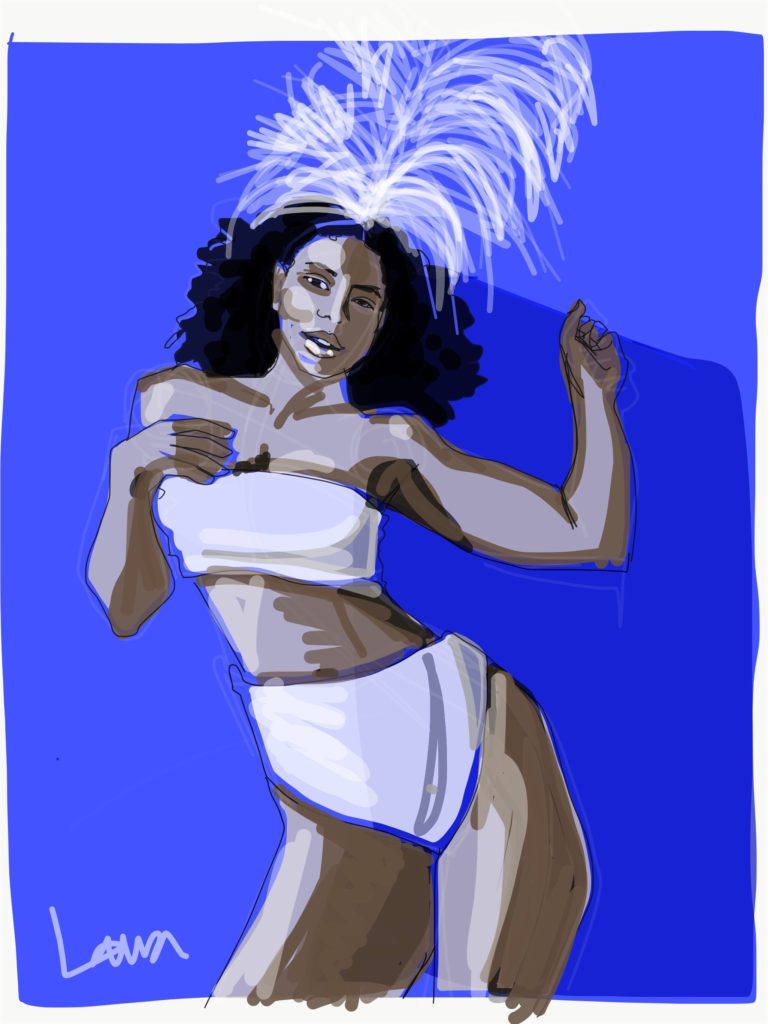
This drawing below definitely expresses something I want to feel!
Do you like to sketch from photos or from your imagination?
The iPad drawing below was created from a photo reference, rather than the imagination.
SIGNUP TODAY FOR ABOUT FACES ONLINE COURSE:
LEARN THREE FASHION ILLUSTRATION APPS FOR DIGITAL DEVICES, plus all my tips for faces, hair, features, from three major angles…i’ll tell you all the pitfalls that most people hit so you can avoid them!!!
I love to share all of the iPad Drawing technique that I use every day to illustrate and enjoy fashion illustration anytime, anywhere!
Lots of Love,
See you soon!
Laura